This section explains how to create tests.
Note: Authoring Tool is an application to create content. There is no difference between practice tests, which train the candidate for a specific matter, or assessments that test the candidate’s knowledge of specific topic areas. These will be differentiated later in Partner Portal after the content is published.
In a nutshell: once you have created the tests in the Authoring Tool, they will be available in the Partner Portal service, which has a Test Catalog to pick the ones you want to send to your students at that moment.
Video
Steps
- Click on CREATE TEST.

Note. If you click on CREATE FROM TEMPLATE, you can download a template to create the test structure (properties, objectives and sub-objectives). Review this post for more information: How to create a test from a template.
If you click on CREATE FROM QTI, you can create the test by importing a QTI file.
- In the new screen, you must fill all fields.

-
- Name: Write the test name.
- Short Name: Write a short name to the test.
- Reference: Write a reference to the test. It’s a code of your choice, like English-001
- Language: Select a language. The platform will be shown on the chosen language.
- Passing score: The number of points that must be achieved in order to be successful in the test (the test is scored out 100 point).
- Duration (minutes): Write the maximum time to make the test if it’s launched in Certification mode.
- Default Questions: Write the number of questions that are published when a practice test is launched. The number of questions can be less than the total number of questions belonging to that test. By default, it is 1. The maximum number you can specify is the total number of questions that the test contains.
- Category: Select a category. You can create a new category by clicking on the Create new category link.

-
- Question Workflow. Select a workflow (the revision process before a question is published) and the users who will work in this test.
- Workflow. You can choose between three different workflows.
- Users. Click in the field and select the users from your organization who will work in this test.
- Question Workflow. Select a workflow (the revision process before a question is published) and the users who will work in this test.
- Click on Save.
Objectives & Questions
You must create objectives and sub-objectives, and assign them to a test, to be able to create questions. Remember that questions are linked to sub-objectives and not objectives.
The objectives and sub-objectives are important to segment the students by their strengths and weaknesses in certain topics. It will also give you a measure of how well are they performing in the competences of your choice.

To create objectives and sub-objectives:
- Click on Add Objective.
- Enter a name by clicking the pencil icon.
Note. If you want to add sub-objectives, click Add Sub Objective. Make sure the menu is uncollapsed by clicking Collapse All/Uncollapse All. If the menu is collapsed, you will not see the sub-objectives you add. You can add titles by clicking the pencil icon or delete them by clicking the trash bin icon:

- Add all objectives and sub-objectives that you need.
In the sub-objectives section, uncollapse all objectives and sub-objectives. This will allow you to assign questions to the test.
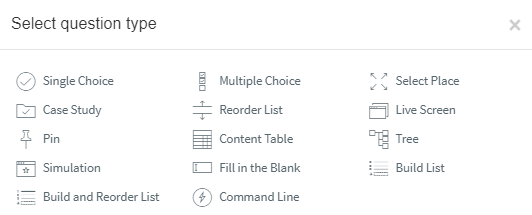
- Click the Add Questions button to open the dialog box that allows you to select the question type and to add them.
Once you have created questions linked to sub-objectives, the application will allow you to edit and delete them by clicking the corresponding icons.
- Click on Save once you have finished.
Note. The test can be reviewed by any member with the Editor role assigned.
- Click on Publish Test to publish the test.
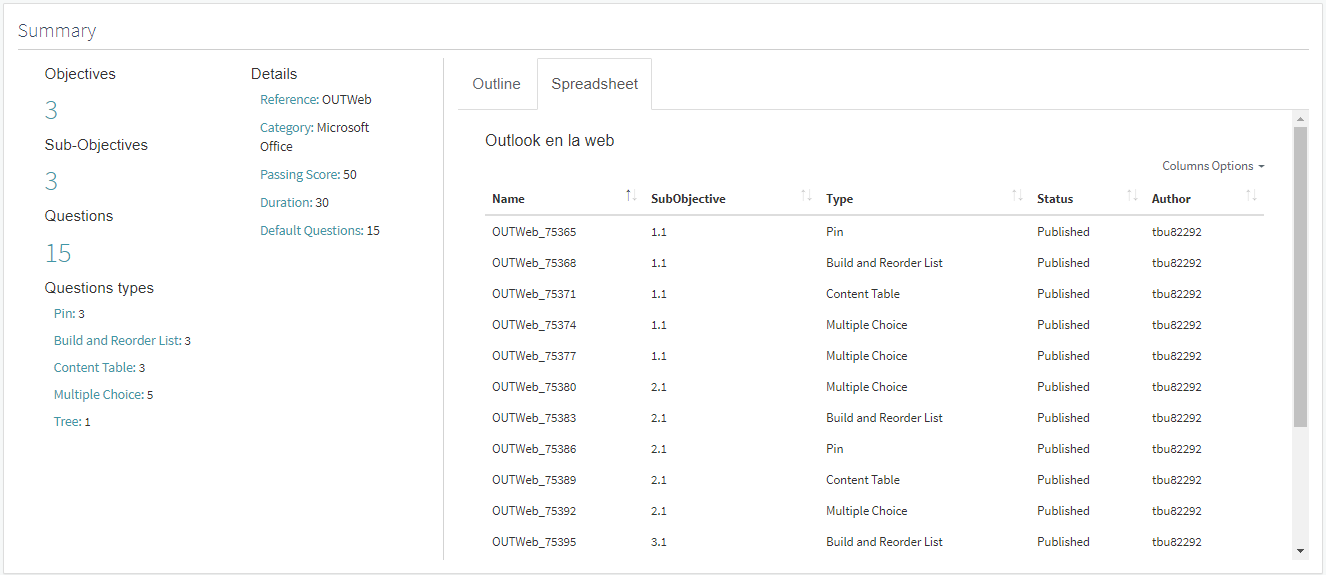
Summary
At the bottom of the Tests window, you will find the Summary section. This is a read-only section and will be populated with the test details.
As you modify the test, this section will be populated with the new details (modifications on properties, objectives, sub-objectives, or questions).
What would you like to do next?
- Do you want to create a test from a template? Click here for more info.
- Do you want to create a question? Click here for more info.
- Do you want to publish a test? Click here for more info.
- Do you want to edit a test? Click here for more info.